Monday, July 19, 2010

a shower? a party? we actually had both.


First of all, all of these stunning pictures were taken by the FABULOUS Emma and Wesley of W+E photography (http://wephotographie.com) Check them out and use them for your next event! They got to the house just as the rain stopped and we had decided to start setting up. (Yes...I was freaking out about the rain!). Not everything was ready yet, so we got a few "in the process" shots. 


For the table scape, I wanted it to look easy, alive, candle-lit, and vintage. I grew succulents and potted them all in the same small terra-cotta pots. I used a few things from our home for the rest of the table scape. The candelabras are from our wedding and the have an older look. The hurricanes have mercury glass, so they fit right in as well.


We also have an ugly fence on the back of the patio. So since we have a wild forest for a yard, Michael and I decided to cut up some branches and attach them to the fence to cover it up. (will post about that later)


The food: We,the hostesses, decided to make the food ourselves. Scary? Yes! But if I do say so myself, it was a hit. I like to keep the menu small so you don't have tons of leftovers. We ended up with our self-named Greek Chicken pasta, pesto crostini, and other types of bread to compliment the pasta and just to snack on. The rest of the food arrived later in the day.


The details: candles, succulents, wildflowers, and soft lighting.


I love lanterns! I found these super cute colored mason jars and knew they would add the perfect effect to our outdoor party. For the next part I needed some man power. I got one of our friends that loves a puzzle and gave him some rope and said, "put these in that tree". One of my main concerns was that the candles would burn out during the party. So, Sean (our lantern master) decided to put them on a, (gasp) duel pulley system. That way closer to the party we could lower the lanterns and light them! Yeah!!

I have also always wanted these super cute hanging teal light holders from CB2 and this was my perfect chance to acquire them. I put them at different levels on the front porch and downstairs as you walk out to the back porch.

To drink we had wine, prescco with rasberries (the brides favorite), beer, and sweet tea vodka with lemonade.


Dessert: Of course the first people I thought of for the most fabulous dessert possible was Proper Measures (www.propermeasures.com). Stephanie and Wil did not disappoint! They brought a strawberry cake, cake bites, oreo pops, and margarita jello shots! Feast your eyes on this.


I wish we had fancy parties more often. This was the most fun to plan and think about. It helps when it is for your favorite bride! Love you Laura! Once again thanks to Stephanie and Wil of Proper Measures and Emma and Wesley of W+E photography, and, of course, Jessica who gave up a day of her life and all of her refrigerator space to make our delicious dinner and all of the other hostesses!


Tuesday, May 11, 2010

Vertical Gardens


I have always loved fresh flowers and plants in the house. The problem is that house plants die when they see me coming. So my mission this spring is to not only maintain an inside plant collection but I am planning on venturing into the great outdoors and making my patio and yard a tropical oasis full of fun.


So far my favorite gardening idea that I have found is from  http://www.instructables.com/ AHHHH! I love these little guys. It won the competition for gardening and you can see why. Please go to the website and you can learn about lots of great things as well as how to make this! BTW it is a shoe holder!


 LOVE! Most of the super fancy ones can be found on www.floragrubb.com. These are such a great way to have an herb garden or a dramatic statement even in an apartment.


the 2 pictures above are succulents. If you know nothing about plants (like me) and kill everything, then these are going to be your best friends. I have had one succulent for about four years now so you know they are hardy.


__________________________________________________________________________________

http://woollypocket.com


This is another great place to look for your next planter. Or if you want to enter into the world of vertical gardens.  OH and guess what else, it is made from recycled materials. Yeah, I know the biggest problem is which one to get.

Last but certainly not least I have great news. Sweet peas in homewood has a really cute version of these vertical gardens. Also these are totally on the list of things to accomplish for our own house this spring. I am hoping to show you what vertical gardens I have been working on soon.


Tuesday, May 4, 2010

A Place to Eat to a Dining Room


Here is a before shot of our dining room. This is the night that the fan came down, which in turn gave me a second wind to start making it a place that we would actually want to eat in.


This is a table that we found at the thrift store for $30. I liked the shape so I decided, of course, to paint it. When I buy a gallon of paint I always pick a color that I could love on anything. This way you save money and you would be surprised at how different colors look in another room.

left side

right side

Here is the dining room today. The light fixture is from Pottery Barn. I thought that it fit the feel of the house and it was in my budget. The chairs with the teal seat are from an awesome store in Pell City called David Tims Antiques. The chairs on the ends are from my grandmothers house. She had extras, so now we can seat more people at the table. I made the paintings from canvases that I had laying around.  I found a fun little drawing on the Internet and painted it myself on the two canvases. I switch the centerpieces on the table all of the time. Right now I have these really great mercury glass hurricanes that I found at Target. The sideboard is from a junk store around town, I did not even have to paint it. Oh, and it opens from the top for storage on both sides. The rug is the newest addition, below is a picture and process for making your own! 


First the inspiration. I love, love, LOVE this.

What you need:
1. Duck cloth (Pick your size I made a 5x9.)
2. Freezer paper cut into stripes. I did 20 inches by 2 inches
3. An iron
4. Acrylic paint and fabric paint (2:1 mixture)
4. Patience


One of the fun things about this rug is being able to just paint anywhere. Also, peeling the freezer paper off and seeing the crisp line is the best.

TADA!

You can also put a rug pad under it or even double up the fabric. Another trick is to paint it with poly. This helps dirt not stick to it. Total cost with paint was $46!  I know!  So fun!  There are tons of websites that show you different versions of how to make cheap rugs. Check them out and make it your own!

Overall, I think that more than having your very favorite thing at this very moment, you should focus on what you have going in the room and paint paint paint. Also switching little things around really helps me love my house every single day.


Friday, April 2, 2010

That 70's Condo


My most recent project has been to bring our condo out of the 70's and make it a place that I actually felt comfortable to live in. As always, I have been on a tight budget throughout the process. So far, we have completed the bedroom and dining room. Other than a few set backs along the way, it has been a ton of fun.

Here is a shot of the dining room before (this is shot from the kitchen looking into the mirror wall, you can also see to the living room in the back).


New dining room! This was such a great adventure for Michael and I.  I found these chairs at Target and it was love at first sight. The fact that you buy them in pack of two and you can pick your colors was right up my alley. They were not necessarily the best deal, but since we are renting the condo I wanted make sure that I did not buy some awesome antique chairs that would break while someone was sitting in them. SO... we had the chairs and after a few junk stores and no table prospects, we were getting a little worried. Then we hit the jackpot! We were driving down Highway 98 and all the sudden there is was, Scavengers. From the moment we walked in and the sign said "pets welcome", we knew we were in the right place. I quickly found 3 tables that I loved. After some wheeling and dealing, we ended up with this little guy! We started talking to the owner and had so much fun deciding what we were going to use as a centerpiece. We decided to keep with the theme of mixing modern and vintage. Of course my go-to for a table is some sort of candle, but I really did not think that it was best to promote strangers lighting fires in the house! Since the table is so small, I took on the project of creating custom sized place mats. I made the place mats under the shell circles by simply coiling rope, but alas I ran out of time and glue so I will have to bring them back next time. We also lucked out with the rug store having a huge sale! We got an indoor/outdoor rug that you can take outside and wash, perfect for renting.

The Old Bedroom


This is the original furniture that my Grandmother picked out when we bought it. She did a great job, because this stuff is totally making a come back. I just thought it could use a good ole coat of semi gloss.


Ahhhh. I can breathe. The bedroom was an easy task. Remove the silly beach stuff, and fake plants, change the bed spread, paint the furniture, and paint some beach themed paintings.


Close up of the dresser.


Here are the paintings I did for the bedroom. Several people have asked about pricing, so here you go!
$25 for one piece and $125 for a set of 6.


Here's a little sandpiper on the opposite wall in the bedroom.


Original wallpaper.


If you can believe it, my Dad bought the painting specifically for this bathroom. My only regret is that I don't have a picture of the plastic underwater scene shower curtain. (later replaced it with a white waffle weave shower curtain)


Lightening the color of the walls and making this whole space much less confusing and busy was the goal.  I also make sure to pick a lighter color than my first instinct on the color chart. I almost always pick a color that almost looks white on the color chip. I want the walls in a room to add to the room rather than be the focus.


Just for Fun!

Soon we will be tackling the living room and the floor. Get ready...

Thursday, March 11, 2010

Let there be light (in pretty containers of course)

 With summer coming up, all I can think about is enjoying the outdoors and how to make our back patio a great place to entertain. I have started thinking about lanterns that I can keep outside to make my home feel like a tropical resort every day. I love to group them, I love them for parties, and to add a little sparkle to every night. I found lots of fun stuff, and since you all have the internet, I spared you the ones that we have all seen a million times. These were my favorites from countless google images searches. If you would like to know where one came from, just leave it in the comments and I can give you the info.


I always like when things are homemade and the crafter puts their own spin on the project, like the soup can lights or the handmade paper lanterns in the pictures above. My favorite new thing I found was the Chinese Sky lanterns or wish lanterns. Amazing!

Sunday, March 7, 2010

Laura's condo

My sweet friend Laura Money got the opportunity to redo her cozy little condo in Crestline village last year. She like everyone who gets into demolition in there home ran into some bumps in the road but her natural design sense made this condo so fabulous.

Bathroom before:


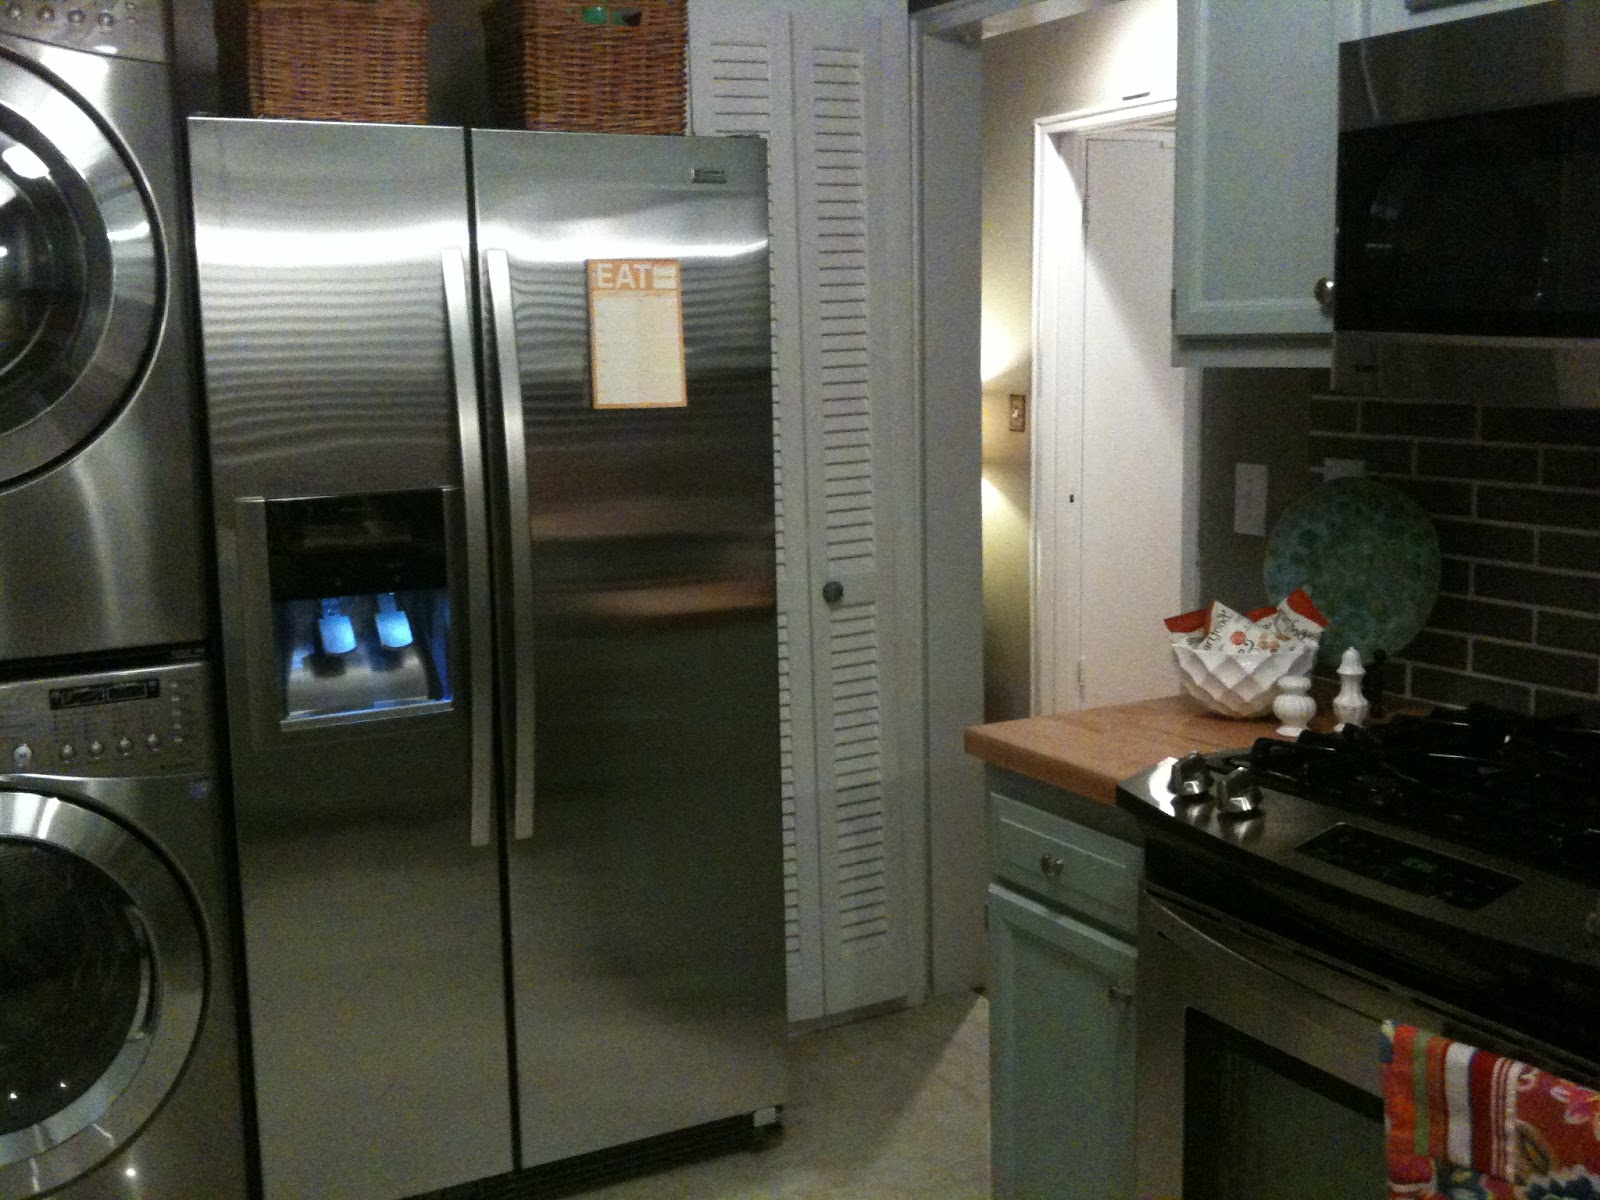
Kitchen before:


Kitchen after:

gray tile, french country cabinets, butcher block countertops and stainless steel appliances oh my! Every decision she made was the right one.

My favorite are the little touches that Laura had added like the Olive tree by the sink, Dean and Deluca spices and a rack, and her vintage tea cups that are scattered around her kitchen and china cabinet.


Bathroom after: 


Laura picked the most beautiful sink and potty! They are loosely art deco styled. She also used her space so well, by switching the old tub with this amazing glass shower door and all white tile! A perfect way to use her small space and make it look so much bigger. I also will say that when you walk in this all white well lit bathroom you instantly feel glamorous.

Thanks so much Laura for sharing you fabulous home with us!